REVIEW · CUSCO
Ausangate and Rainbow Mountain Trek – 3 Days / 2 Nights
Book on Viator →Operated by Salkantay Trekking · Bookable on Viator
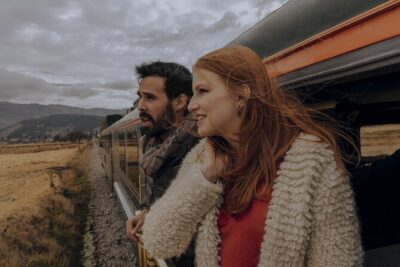
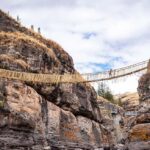
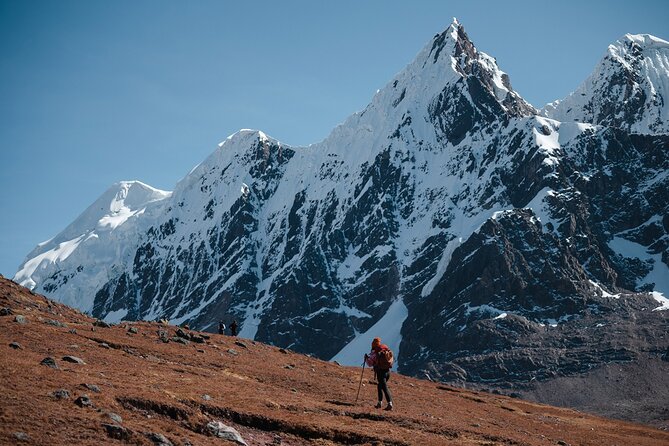
Ausangate feels like another planet. I love how this trek links Ausangate crystal lakes with two high passes, so the scenery keeps changing every few hours. I also like the “easy button” parts: hotel pickup/drop-off plus round-trip transfers from Cusco, so you spend more energy on the hike and less on logistics. One consideration: this is a tough, high-altitude trek, so you’ll want solid fitness and a calm approach to altitude.
What really makes it click is the full-service camping setup. I love that your camp includes the gear to stay comfortable at night (tent, sleeping bag, air mattress, and more), plus warm drinks and real meals after big climbs. If you’re sensitive to altitude or you get chilled easily, the early cold mornings and steep sections will still demand respect, but the included support makes it manageable for many people.
In This Review
- Key highlights worth planning for
- The 5:00 am plan and why it matters
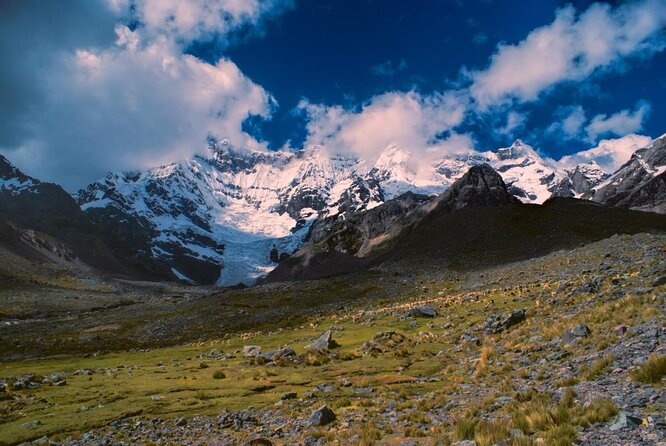
- Day 1: Upis to Hatun Pucacocha at the feet of Ausangate
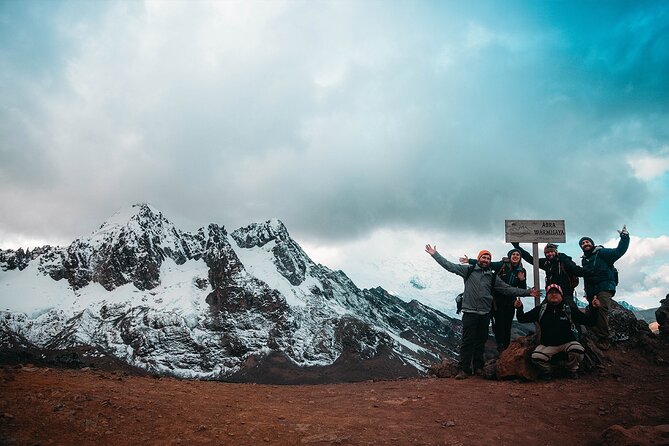
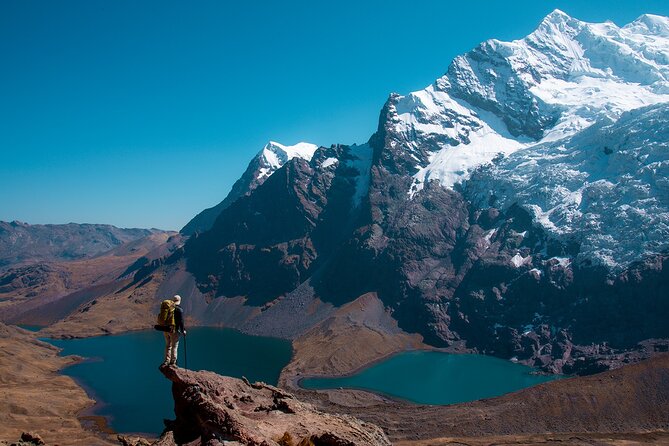
- Day 2: Puca Pass, glacial lagoons, and the Warmisaya 360 view
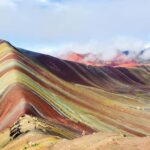
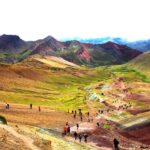
- Day 3: Vinicunca early for Rainbow Mountain, then back to Cusco
- Camping comfort: tents, sleeping bags, and not freezing at night
- The real value: guides, cooks, and the small details that matter
- Price and what $535 gets you (and what it saves)
- Who should book this trek, and who should think twice
- Should you book Ausangate and Rainbow Mountain (3 days / 2 nights)?
- FAQ
- What time does the trek start?
- How long is the Ausangate and Rainbow Mountain trek?
- Is camping equipment included?
- Are entry fees included for Ausangate and Rainbow Mountain?
- How much luggage can I have carried on the hike?
- Do they provide oxygen or first aid?
Key highlights worth planning for
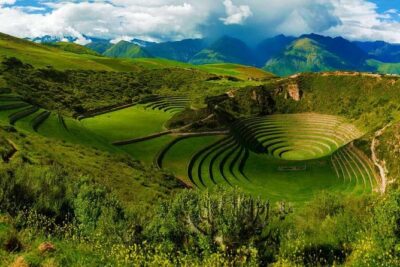
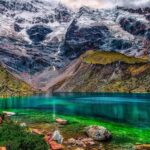
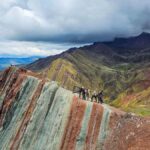
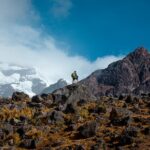
- Crystal lakes around Nevado Ausangate: big views, fewer crowds than the big-name trails, and a route that feels remote.
- Two demanding passes (Puca and Warmisaya): each crossing brings a new set of glacial lagoons and photo angles.
- Rainbow Mountain timed to miss most crowds: you’ll push out early so you can enjoy Vinicunca before the swell.
- Camp comfort that’s practical, not basic: sleeping bag + air mattress + extra warmth items reported by other hikers can matter a lot.
- Team support at altitude: experienced guides, a mountain chef, first-aid kit, and an oxygen supply are part of the package.
The 5:00 am plan and why it matters

Your trek kicks off at 5:00 am, with pick-up and transfer from Cusco built into the schedule. That early start is not just for show. At these elevations, weather shifts quickly, and the light changes fast. More importantly, Rainbow Mountain (Vinicunca) is a place where timing can make or break the experience. Going early means you can actually look, pause, and take photos without feeling rushed or shoulder-to-shoulder.
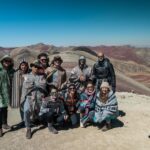
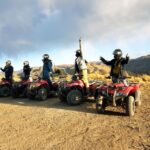
This is also where you’ll feel the “tough love” of high-altitude travel. Morning air is crisp, your body is adjusting, and you’ll likely want a slower, steadier pace than you’re used to at home. Your guide will set the tempo for the group, and the small group size (max 12) helps with that.
You can also read our reviews of more hiking tours in Cusco

Day 1: Upis to Hatun Pucacocha at the feet of Ausangate
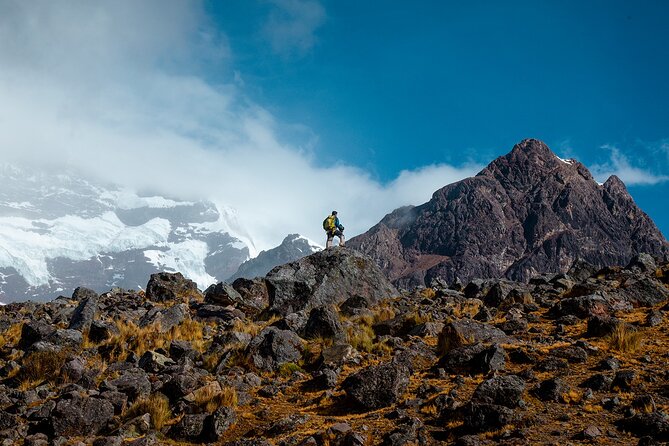
Day 1 begins with a drive to the small town of Upis, then you start walking for about 3 hours toward lunch. This is your first taste of how the Ausangate region works: big mountain presence, open sky, and that high-Andes feeling where the air looks cleaner than you expect. You’ll pass viewpoints where Ausangate is the main character, and it’s a good day to take it slow and let your breathing settle.
After lunch, you get a short rest and then move uphill again toward Arapa Pass. Even if you’ve hiked before, passes at altitude aren’t about speed. They’re about patience. This is also the day you start to feel how the camp experience ties in: by the time you descend to Hatun Pucacocha, you’re tired in a good way, the kind that makes dinner taste better than usual.
That night is at the camp near the foot of Ausangate, and the plan includes hot drinks, dinner, and time to recover. This is where camping support earns its keep. When night temperatures drop, you don’t want to be fighting cold while your body tries to recover from a long day.
What you should watch out for on Day 1: the combination of early timing and elevation. Even if the walking time doesn’t look insane on paper, your effort can feel heavier up high.
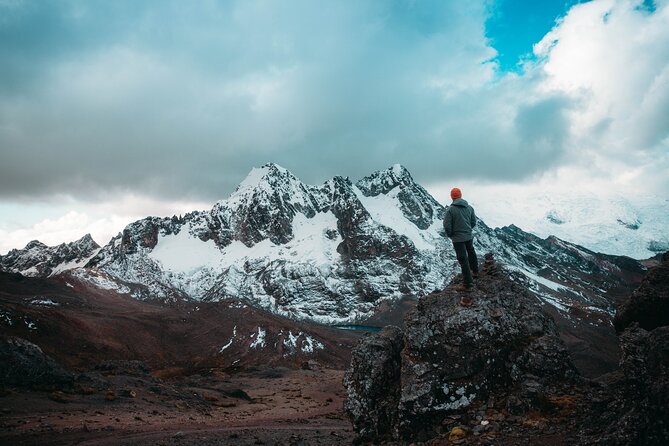
Day 2: Puca Pass, glacial lagoons, and the Warmisaya 360 view
Day 2 starts with hot coca tea and breakfast, which is exactly what you want before another push. From there, you head toward Puca Pass. This portion is all about scenery and photo stops—glacial lagoons, bright sky windows, and the kind of dramatic contrast that makes you stop without realizing it.
You might even spot a condor overhead if the day lines up right. And since weather can change, the best move is to stay present. This is one of those days where you’ll think, I should take a picture, and then you’ll notice you’re still staring at the view even after the photo.
After reaching the lunch spot at Anantapata, you continue hiking up toward Warmisaya Pass. This is the big “turning point” day for views. The plan calls out a 360-degree perspective, and it’s also where Rainbow Mountain enters the picture for the first time—often a gradual reveal rather than one instant photo.
Then you descend to Surinecocha for dinner and rest. Day 2 is typically the mental test: you’ve seen a lot by now, but the best part might still be coming on Day 3. If you pace yourself well here, you’ll enjoy Day 3 more than you thought possible.
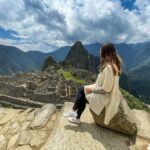
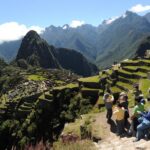
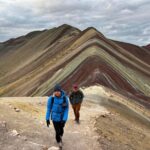
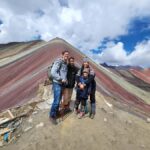
Day 3: Vinicunca early for Rainbow Mountain, then back to Cusco
On Day 3, you wake up early again to reach Vinicunca (Rainbow Mountain) before other tourists arrive. This timing is one of the smartest parts of the whole trip. Rainbow Mountain can get crowded, and crowds make it harder to appreciate the place. Early access gives you time to look, learn, and take your time on the slopes.
Along the way, you stop for initial views and then continue onto the mountain itself. The plan includes time to learn about the importance of the site, not just stand there for a quick snapshot. After that, you hike back down to meet private transport, grab lunch, and then return to your Cusco accommodation with drop-off right to your door.
Why this structure works: the day is “high reward, high intensity, then recovery.” You get the big moment, then you’re not stuck in transit or forced to keep hiking after you’re done.
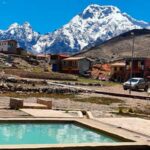
Camping comfort: tents, sleeping bags, and not freezing at night

Camping on high-altitude treks can go two ways: either it’s genuinely comfortable for a multi-day outing, or it’s a cold endurance test. This tour includes the core items you need to stay warm and sleep: sleeping tent, air mattress, and sleeping bag, plus a dining setup with tables and chairs.
You’ll also get rain protection in the form of hiking poles and a rain poncho, and the kit includes a first aid kit and oxygen supply. On one trip, oxygen was even used the first night for an altitude issue, which shows the team takes altitude seriously and is ready to respond.
Another comfort detail I appreciate is how practical everything sounds. Hot drinks after a hard day aren’t a luxury. At these elevations, warmth helps your body shift from exertion to recovery.
If you run cold, treat your layered clothing like part of the equipment plan. Even with a good sleeping bag, being prepared helps you sleep sooner and wake up less miserable.
You can also read our reviews of more tours and experiences in Cusco


The real value: guides, cooks, and the small details that matter
This trek is not “just a walk.” It’s a staffed operation, and the difference shows up in how organized camp feels after long days. Multiple guides have led this route—names you might see include Nestor, Marco, Fredy Apaza, Pabel, Darwin, Elisban, and Franklin. What they have in common is a focus on safety, pacing, and making the hiking portion match the group.
I especially like when the route is flexible. On smaller groups, guides can add a detour to catch special viewpoints or adjust timing so you’re not constantly racing. One reviewer described their guide adding non-traditional detours for faster hikers, which is the kind of detail you notice when the team isn’t stuck in a rigid script.
Then there’s food. The mountain chef experience shows up as real meals, not “survival meals.” Many hikers highlight how meals were nutritious and genuinely tasty, even in remote conditions. That matters because high-altitude days can drain you faster than expected, and good food helps you keep moving without feeling wrecked.
Price and what $535 gets you (and what it saves)
At $535 per person for a 3-day / 2-night trek, you’re paying for more than guiding and hiking. The included value stack is what makes the price make sense:
- Entry fees for Ausangate and Rainbow Mountain
- Camping equipment (tent, sleeping bag, air mattress, and dining setup)
- Luggage transport up to 7 kg, so you can hike lighter
- Private transfers and hotel pickup/drop-off in Cusco
- Water and snacks, plus 3 lunches, 3 breakfasts, and 2 dinners
- First aid kit and oxygen supply
- Rain poncho and hiking poles
If you tried to DIY parts of this, the entry fees, transfers, and full camping setup would add up fast. Plus, doing this route on your own at high altitude is not a weekend project. You want local expertise and built-in contingencies, and this package is designed to handle that.
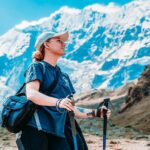
The one “cost” you should mentally budget is effort. This trek requires strong fitness, and it asks you to work at altitude while carrying almost nothing—so the hike itself becomes the main investment.
Who should book this trek, and who should think twice
This experience is a strong match if you want:
- a high-altitude trek with multiple passes (not just one long climb)
- a smaller group setting (maximum 12)
- camping where comfort is taken seriously
- the best chance to see Rainbow Mountain early, before it gets busy
It’s also a good plan if you appreciate practical support. The oxygen supply, first aid kit, and experienced mountain guide setup reduce the anxiety factor that can sink other trips.
Think twice if you know you struggle with altitude or if you’re not ready for steep sections. The trip is challenging, and the start times are early—meaning you’ll want to arrive in Cusco at least 2 days before to adjust.
Vegetarian and vegan options are available if you tell the operator in advance, which is a simple but important detail.
Should you book Ausangate and Rainbow Mountain (3 days / 2 nights)?
Book it if you want a trek that feels remote, structured, and built around comfort at night, with the payoff of Rainbow Mountain timed well. I like that the itinerary doesn’t just chase a single viewpoint. You get crystal lakes, two passes, and a real sense of mountain rhythm over three days.
Skip or reconsider if you’re aiming for an easy outing or you’re worried about altitude. This is not a gentle stroll, and your body will notice the elevation whether your head is excited or not.
If you do book, plan your clothing like a checklist: layers for cold mornings, and a mindset that slows you down on the climbs. You’ll still be moving. You’ll just move smarter.
FAQ
What time does the trek start?
The meeting start time is 5:00 am.
How long is the Ausangate and Rainbow Mountain trek?
It’s a 3-day trek with 2 nights camping.
Is camping equipment included?
Yes. The tour includes camping equipment such as a sleeping tent, air mattress, and sleeping bag, plus dining setup items.
Are entry fees included for Ausangate and Rainbow Mountain?
Yes. Entry fees for both Ausangate and Rainbow Mountain are included.
How much luggage can I have carried on the hike?
Luggage transport on the hike is included for up to 7 kg.
Do they provide oxygen or first aid?
Yes. A first aid kit and an oxygen supply are included.